Supplies Needed:
I am using PSPX2(any version should work)
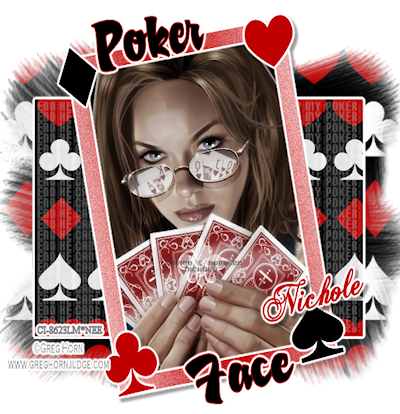
Tube by Greg Horn, you can purchase HERE
Template 173 by Missy HERE
My Supplies made by Me HERE
Mask of Choice
Plugins-Eye Candy 4000-Gradient Glow, Mura Meister Copies
Fonts: Carbon Block, A&S Rhino, Chopin Script
Open template
Open Paper, copy, select rectangle layer, Selections, select all, float, defloat,
Paste as new layer, selections, invert, delete, DO Not Deselect
Effects, Plugins,Gradient Glow.
Settings: 3,25, 100. Click on Color Choose Fat. You may leave white or change color
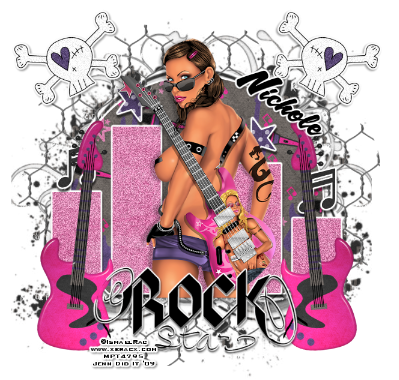
Type out the phrase" NO HE CAN'T READ MY POKER FACE" using carbon block font 22px,
background medium gray, foreground null,
Convert to raster,Effects, Plugins, Mura Meister Copies,Apply these settings
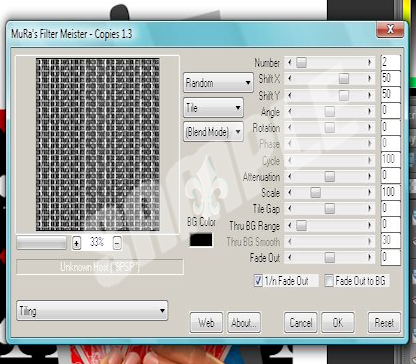
Invert, Delete, Selections None.
Change opacity to 42 on word layer
Take your tube, paste as new layer above background frame
Duplicate tube on duplicate layer, adjust, blur, gaussian blur, 3, change blend mode to soft light,
On original tube layer change blend mode to Luminance (Legacy), Apply Dropshadow 4,4, 40, 4.00
Select the frame layer, Selections, Select all, Float, Defloat, New Raster Layer,
Change the foreground to Red, background to white, Click on red select gradient, foreground,
Angle 75, Repeat 1, Flood fill new raster, Selections select none, Effects, Effect Browser, Add noise low grain
Apply gradient glow same settings
Delete off bracket layers, and white background
Take the shapes i supplied and position like mine on the frame or wherever you like
Open your mask, Use the paper i supplied, Layers, Mask layer, Delete Mask, Merge group, Send to bottom
Using A&S Rhino type out Poker, red, foreground, black,background, stroke width 2
Apply gradient glow, arrange at top
Repeat for the word Face.
Apply license number and proper copyright.
Add name with Chopin Script size 48px, color red, stroke width one, convert to raster, apply gradient glow, add drop shadow, same settings as before, Image free rotate, rotate left 15.00.
Merge visible and save as a .png.
Thank you for trying my tutorial. If you share yours with me please resize to 400 wide so I can place in the blog.
XOXO, Nee
Posted in
Tutorials FTU
by Nichole {Nee}
|
Made by Nita. Girl this tag rocks!! I love it! Thank you

Made by Jenn. Thank you hun!!
Posted in
Made for Me
by Nichole {Nee}
|
Made by Nita. Thank you!!

Made by Sherry. This is awesome hun thank you!!
Posted in
Made for Me
by Nichole {Nee}
|
Supplies used:
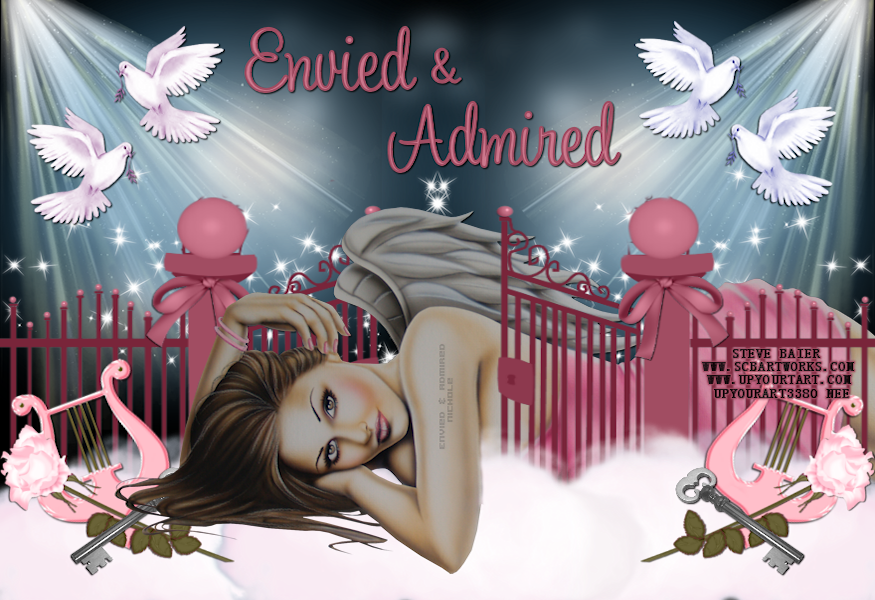
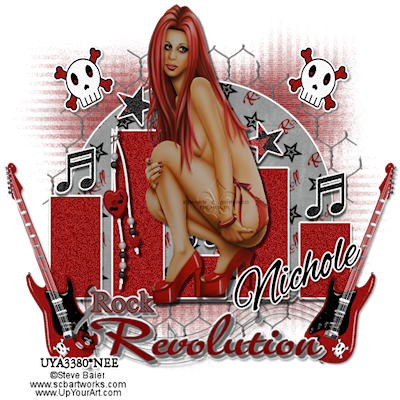
I am using the beautiful artwork of Steve Baier you can purchase from UPYOURART
Tag Template 34 from Wicked Scraps HERE
Scrapkit from Wicked Scraps Rock RevolutionMask of choice
Plugins:Eye Candy 4000-Gradient Glow
Font of choice. I used AlexBrush
Open tag template delete copyright delete white background.
Canvas resize to 700x700
Select the circle layer, selections, select all, float defloat,
open paper 8, copy paste as new layer, selections, invert, delete.
Selections none.Apply Gradient Glow. Settings 3, 25, 100, Fat, Apply dropshadow 5,1,60,3.00
Rename layer, delete original layer.
Repeat these steps for the notes and stars
using paper 1 for notes, paper 6 for stars
Select the bars layer, (if you want to add a paper repeat above steps)
Effects, Effect Browser, Add noise med-grain, apply gradient glow, add dropshadow same settings
Delete words layer and place RR-wordart 2 in its spot.
Apply Dropshadow 5,5,60, 3.00, Gradient Glow, Dropshadow, 2,2,40,4.00
Open your tube resize if needed place in middle, apply dropshadow 5,5,50 5.00
Open your mask, Open paper 4, layers, new mask layer,
apply mask and delete mask layer, merge group
Copy paste as new layer send to bottom,
Open wire and paste above mask resize if needed.
Open the guitar, resize to fit, free rotate left place on left side,
Image, duplicate, mirror, merge down, apply dropshadow, 2,2 40, 4.00
Open string beads, resize, place as mine, add dropshadow
Open skull 1, resize, apply noise, low-grain
Place on left, image, duplicate,mirror,merge down,
Gradient glow, apply dropshadow
Apply copyright and license
Add your name set foreground and background to 000000
Convert layer to raster, Free rotate left, Gradient glow, Dropshadow
Merge visible and crop or resize as needed.
XoXo, Nee :)
Posted in
Tutorials FTU
by Nichole {Nee}
|

Supplies Needed:
I am using the artwork of Suzanne Wolcott you can purchase HERE
Spring Kit from Kittz Kreationz
Mask of choice, I used Vix Mask 206
Font of choice, I used A&S Snapper Script
Open the frame and flower custer resize canvas 800x500
Click inside each square with magic wand, Selections, Modify, Expand by 3
Open paper S-Paper 8 image rotate right, Copy paste as new layer on frame, invert, delete.
Open your tubes place in each square. Invert, delete when happy with placement. Selections None.
Hide (do not delete click eye next to image on right side) frame and paper Merge tubes visible.
Apply Dropshadow of choice or 1,1,30,3.00
Unhide frame and paper
Open springword and colorize to match if you choose.
Place at the bottom or where you like, add dropshadow 1,1,30,3.00
Open the bows pick one crop it copy and paste as new layer position where liked and resize to fit.
Open pink tulip place bottom right hand corner resize to fit, duplicate, mirror. You may have to reposition so its on the frame.
Merge down apply dropshadow.
Open doodle1 postion to the left side, duplicate, mirror.
Open mask and paper of choice. New mask layer, delete mask and merge group, Copy paste as new layer, send to bottom.
Add proper copyright and license number.
Add your name. Foreground color:53c4fd
Background color:dc4051
Stroke width:2, Free rotate 20 left. Add dropshadow
Merge Visible. Resize if desired.
Posted in
Tutorials FTU
by Nichole {Nee}
|