Supplies Needed:
PSP X2 & ANIMATION SHOP
"Beach Bliss" Kit by Michelle you can purchase at Paradise 4 Scrappers
Plugins: Loka software 3d shadow: HERE (free filter)
Visman's VM Natural Acid Rain: HERE (free filter)
Eye Candy 4000 Gradient Glow
Tube of choice: I am using the artwork of Michael Landefield you can purchase at CILM
Mask of choice
Font: Tiamaria Script
Lets begin:
Remember to save often
Open supplies and minimize
New raster 700x700 transparent
Select your rectangle shape
Background null
Foreground black (000000)
Straight line selected and line width 10
Draw a rectangle on the left side
convert to raster and Duplicate Image mirror
Merge down
Take your magic wand and click inside both
Selections modify expand by 5
Paste Paper 8 as new layer
Selections Invert hit delete on keyboard
Move below frames
Now duplicate the pink paper layer twice. You should have a total of 3
On the bottom layer:
Apply VM Natural Rain on my settings
Amount: 9
Inner brightness: 255
Outer: 0
Refraction: 47
Random Seed 133
On the next layer up change Random Seed to 150
Next layer up change Random Seed to 175
Paste tube as new layer position on the left add a dropshadow
10
10
21
10.26
Duplicate Image Mirror
Paste 5 (net) as new layer send to bottom
Position top in between both rectangles
Duplicate image flip
Paste Paper 11 as new layer
Send to bottom
Layers
New Mask Layer from Image
Select your mask
Delete mask layer from the side
Merge group
Position towards the top right,br>Duplicate Image Mirror Flip
Paste your tube as new layer
Position as mine
Effects Plugins Loka 3d shadow
Apply factory settings
Paste castle as new layer and position bottom right
Resize 35%
Dropshadow
2
2
21
10.26
Paste flower 14 as new layer
Resize 15%
Duplicate image mirror
Duplicate again and move flower to position on the other corner of frame
Paste 11 water as new layer
Resize 35%
Position on bottom left of frame and dropshadow
Paste pink beach ball as new layer
Resize 35%
Position as mine and dropshadow
Layers new raster layer
flood fill white send to bottom
Apply copyright and license info
Type your name
Free Rotate Left 15
Convert to Raster
Gradient glow:
3
25
100
Click color tab
Select Fat
Position as mine and dropshadow
If your not going to animate then save as a .png
On to animation:
Hide two of the layers we applied acid rain to earlier
Edit, Copy Special, Copy Merged
Paste as new animation in animation shop
Back to PSP
Hide layer and unhide another
Copy Merged
Paste after current frame in animation shop
Repeat for next layer
In animation shop Edit Select all
Animation Frame Properties 35
View your animation
Save as .gif
Thank you for trying my tutorial
XoXo, Nee
Posted in
Tutorials PTU
by Nichole {Nee}
|
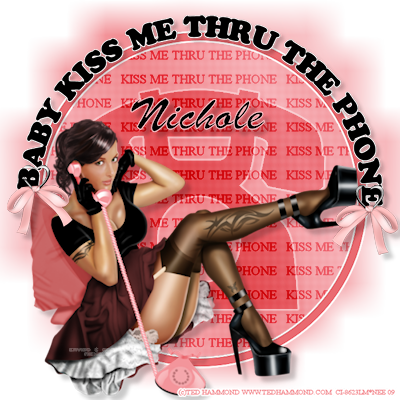
Supplies Needed:
Template 7 by Me you can get HERE
Tube by Ted Hammond you can purchase at CILM
Plugins: Penta.com color dot, Mura Meister Copies, Eye Candy 4000 Gradient Glow,
Fonts: Times New Roman, Brush Script std
Mask 10 by VIX
Bow of choice
Lets Begin:
Open supplies
Pick two colors from tube
Dark for the foreground & light for the background
Go to gradients select foreground
Angle 65 Repeat 3
Minimize all but template
Delete copyright layer
Select the circle layer
Selections, Select all, Float, Defloat
New raster layer
Flood fill with gradient
Effects, Plugins, Penta.com color dot
Settings
90
2
255
255
255
Type the words: "baby kiss me thru the phone"
Times New Roman
22px
color:000000
Objects align center
convert to raster
Apply Mura meister copies with these settings

Selections, Invert, Delete, Selections, None
Change blend mode to Overlay
Select the circle frame
Selections, Select all, float, defloat,
new raster layer, flood fill with the solid color you chose before
Effects Gradient glow Settings
3
25
100
color tab
fat
Selections,None
Select the phone layer
Gradient Glow keep settings
Change blend mode to soft light
Apply dropshadow
6
6
21
10.26
Select wordart
Selections, Select all, float, defloat, Modify Expand 2
New raster layer
flood fill white
move layer below wordart
selections none
dropshadow keep settings
Paste tube as new layer and resize if needed
Position as mine and dropshadow
10
10
25
10.26
New Raster Layer
Move above white layer and flood fill with gradient you used earlier
Layers, New mask layer, from image
select your mask
source luminance checked
Delete mask layer from side
merge group
resize 125%
Take your bow I choose one with a heart on it. and paste as new layer
Resize 35%
Place on B
Duplicate layer and move below wordart.
On original layer erase so it looks like its hanging on it.
Dropshadow and repeat for E on the other side
Apply copyright and license info
Write your name Brush Script std
80px
Stroke width 2
Choose a light color from tube for you foreground and black for background
Position as mine and apply dropshadow
Delete white layer if you want a transparent background and save as .png
Thank you xoxo, Nee
Posted in
Tutorials FTU
by Nichole {Nee}
|
Supplies Needed:
PSP X2
"My lips like sugar" by Missy. You can purchase at Scraps With Attitude
Template 177 by Missy at Divine Intentioz
Tube by Jamie Kidd you can purchase from CILM
Plugins: Eye Candy 4000-Gradient Glow
Penta.com Jeans
Mask of choice
Font: A&S Snapper Script
Lets Begin:
Open supplies and minimize all but template
Delete copyright layer
Resize canvas 600x600
Delete white background
Select the Shape layer
Selections, Select All, Float, Defloat
Paste Paper19 as new layer
Selections, Invert, hit delete on keyboard
Effects, Plugins, Eye Candy, Gradient Glow, Settings:
3
25
100
Click on Color tab
Select Fat
Hit ok
Selections, Select None
Select the Circle layer
Selections, Select All, Float, Defloat
Crop a piece of your tube and paste as new layer
Position on top circle
Selections, Invert, Delete
Paste another in the middle and hit delete
Repeat for third circle
On the circle layer apply Gradient Glow keep settings
Select one of your tube layers
Duplicate layer
On the duplicated layer
Adjust, blur, gaussian blur 10
Change blend mode Soft Light
On orginal tube change blend to Luminance (L)
Back to Duplicated layer
Effects Plugins Penta.com Jeans Settings
Amount 62
Border width 4
Repeat for each piece of tube
Select the Rectangle layer
Selections, Select All, Float, Defloat
Paste Paper3 as new layer
Resize 75%
Selections, Invert, Delete
Apply Gradient Glow same settings
Selections, Select None
Paste close up of tube as new layer
Resize 75% if needed
Image, Free Rotate, Right 12
Position over rectangle 2
Select Rectangle2 layer
Selections, Select All, Float, Defloat
Select your tube layer,
Selections, Invert, Delete
Duplicate tube
On duplicated layer
Adjust, Blur, Gaussian Blur 10
Change Blend Mode to Overlay
Orginal tube layer change blend mode to Luminance (L)
Back to duplicated layer
Apply Penta.com Jeans
Settings
34
4
Apply Gradient Glow to rectangle 2 layer
Apply Dropshadow
3
-2
21
10.26
Paste Paper 14 as new layer
Send to bottom
Layers, New mask layer
From Image
Select your mask
Source luminance checked
Hit ok
Delete mask layer on the side
Merge Group
I did an another mask using paper 15 * this is optional* Repeat above steps if you use 2 masks
Paste wordart 1 as new layer
Resize 40%
Position as mine
Dropshadow keep settings
Paste bubbles as new layer
Position under rectangle 2 layer
Change blend mode to screen
Paste bow 4 as new layer
Resize 15%
Dropshadow
Free Rotate Left 5
Position by middle circle on left
Paste beads as new layer
Resize 55% Position as mine
Paste bow 1 as new layer
Resize 25%
Position as mine on top of beads
Paste note cards as new layer
Resize 25%
Position bottom left
Paste pink lips as new layer
Resize 10%
Place on card as desired and change opacity to 71
Paste Marker 2 as new layer
Resize 35%
Position as mine and dropshadow
Paste buckle 3 as new layer
Resize 15%
Position as mine
Paste bubblegum machine as new layer
Resize 25%
Position under word art bottom right
Paste cotton candy as new layer
Resize 30%
Position under wordart
Free Rotate Right 10
Paste sequins2 as new layer
Resize 25%
Position under note cards
duplicate, image,mirror
Apply license info & copyright
Select font tool
A&S Snapper Script
48px
Stroke width 1
Kerning 0
Type your name Free Rotate Left 15
Position on cards
Change blend mode to Dissolve
Save as .png for transparent background
Thank you for trying my tutorial
XoXo,Nee
Posted in
Tutorials PTU
by Nichole {Nee}
|
Rachel from Flutterby Tags and Snags made this tag for me using my "4th of July" FTU kit. Thank you girl I love it.
by Nichole {Nee}
|
My girl Michelle made this beautiful tag with my "4th of July" FTU kit.
Thank you so very much. I love it.
Posted in
Made for Me
by Nichole {Nee}
|
Alyssa used my "Royalty" FTU kit. I love it hon its beautiful. Thank you so much for taking the time to make it!!
Please stop by her blog and check out her tutorial HERE
Posted in
Made for Me
by Nichole {Nee}
|
Made by Shani with my Heaven Sent Kit. I love this hun. Its beautiful. Thank you so much!!!
Please check out her tutorial HERE.
Dont forget to leave her some love!!
XoXo,Nee
Posted in
Made for Me
by Nichole {Nee}
|
Supplies Needed:
PSPX2
Wickedly Dark kit by Shani
Tube used Pinuptoons you can purchase at CILM
Two twilight pictures of choice
Font: TheNautiGal, Times New Roman
Plugins: Eye Candy 4000 Gradient Glow
Mask of choice
Lets Begin:
New Raster 700x700
Paste frame 3 as new layer
Free Rotate Right 90
Click inside with your magic wand
Selections, Modify, Expand 6
Paste the picture your going to use for a background as new layer
Selections Invert Delete
Paste tube or if you have to make one just erase the background of second picture
Paste as new layer
Hit Delete to remove any excess if needed
Paste tube as new layer
Position bottom left
Dropshadow
3
3
21
3
Select your text
Type the word Forbidden with TheNautiGal size 80px
Press spacebar then change font to Times New Roman 26px
Type to remember
Convert to raster
Apply Gradient Glow
3
33
100
Color
Fat
Repeat for Terrified to forget
Position as mine
Paste rose 2 as new layer
Position top right of frame
Duplicate, Image, Mirror
Paste heart chain 1 as new layer
Position top right corner of frame
Dropshadow keep settings
Paste bow 3 as new layer
Position to bottom of frame
Send below tube and words
Paste paper 8 as new layer
Send to bottom
Apply Mask
Select font. I used thenautigal
Color:Red
72px
Free rotate left 15
Convert to raster
Gradient Glow same settings
Put your license number and copyright info
Save as a .png for transparent or you can add new raster send to bottom flood fill white then save
Thank you for trying my tutorial
XoXo, Nee
Posted in
Tutorials FTU
by Nichole {Nee}
|
Supplies Needed:
PSPX2
My Heaven Sent Kit HERE
Tube of Choice: I am using Gennadiy Koufay you can purchase at CILM
Mask of choice
Font used: Burgues Script
Lets Begin:
New raster 700x700 transparent, or white whatever you like to work with
Paste frame 10 as new layer...dont freak if its blank...lol
Resize 35%
Take your magic wand click in the middle
Selections, Modify, Expand 4
Paste Paper 2 as new layer
Selections, Invert, Delete
Move below frame
Dont deselect
Open gate position to the right
Dropshadow
0
0
21
6
Duplicate Image Mirror
Hit delete on each layer of gate to remove the excess
Paste cloud 1 as new layer
Position to the bottom of gates hit delete
Dropshadow keep settings
Hit delete
Selections Select None
Paste drops 4 as new layer
Resize 40%
Position so they look like they hanging on the gate
Paste bow 3 as new layer
Resize 30%
Position as mine
Duplicate Image Mirror
Paste tube as new layer
Send to top
Duplicate
Move the duplicate layer below frame
Erase and extras off the bottom so it looks like she is behind the frame
Dropshadow bottom layer
5
5
21
5.00
Paste fountain 1 as new layer
Position as mine and dropshadow
Duplicate Image Mirror
Pick a dove and paste as new layer
Position as mine or as desired on the fountain
Duplicate and Mirror
Repeat if you use more than one set
Paste cloud 3 as new layer
Dropshadow
1
1
21
2
Position bottom right by base of fountain
Duplicate Image Mirror
Paste heart doodle 1 as new layer
Positon above fountains and below clouds
Duplicate Image Mirror
Paste paper of choice as new layer
Send to bottom
Apply Mask
Apply copyright and license
Add your name
Save as a .png for transparent background
Thank you for trying my tutorial and using my kit
XoXo, Nee
Posted in
Tutorials PTU
by Nichole {Nee}
|